Here, you have complete JLR DD 139 download free as it was on servers with picture proof and also a fix for it. And bonus for all is how to install for Passthru Actia and VAS 5054A
Also you have a Virtual Machine with kit installed for you just to patch and put your options. Instructions inside the VM.
(BIG THANKS to Fantomel)
Part 1: Free download JLR SDD 139.17 with VAS5054A/PassThru Actia VCI1/2
Install KIT fix and passthru options
https://mega.nz/#F!itUzyTLa!HtbDxygF72O_qQ12n8SBVQ
Virtual Machine with installed kit and patch+options inside
https://mega.nz/#!TRRE2K4Y!yWmksyPXiDv7hQIyjLi8R52WdIAt11OzkTLU2ghyWpw
Free for all
PASSWORD: jlr4freebyfantomel
Read the texts and pdf to understand all , even from patches.
Enjoy by Fantomel
Part 2: How to install JLR SDD 139.17 PassThru VCI1:
IMPORTANT NOTES:
- DO NOT try to Install JLR SDD in your PC,
IF Ford or Mazda IDS or Honda HDS ALL READY existing!
- DO NOT try to Install JLR SDD under NONE English OS!
You must use ENGLISH for Windows XP OS and PRO with SP3 ONLY!
You can install under Windows 7 (Professional or Ultimate ONLY)
but ONLY under 32Bit! Under 64Bit it WON’T work properly!
Also DO NOT try to install JLR SDD ecxept from drive letter C:
DO NOT try to use D: or E: and so on! ONLY the C:
- 1st of all DISABLE FULLY your Internet Connection in your machine!
So…
- In a FULLY “Clean” PC Start to installing ALL of those that you have
from your source (HDD, DVD’s, web, ect.) and with the PROPER line, and follow
for EACH of them your simply screen instructions from the installations…
- When you will finish with ALL your installations, apply the JLR SDD Patch that you have.
- Run now from your Desktop the SDD, wait some seonds/mins till SDD to launch in your IE!
- When you log-on to your SDD use about Dealer Information Account, your most closer Dealer to your area and Save!
- Now you can visit the SDD menus, for to configure some settings that you need
such as Language, Measurement Units, ect.
OPTIONAL BUT VERY IMPORTANT AS WELL:
IF you want to Update your SDD ECU Calibration Files, you need NOW to enable
your Internet Connection and also to Enable in your SDD his Network Option!
So for to enable in your SDD his Network Option, 1st ENABLE your Internet connection
and go to your SDD System Utilities > Network Options > “Tick” in the small Window >
Enable and then you can start your Update from System Utilites and about the
ECU Calibration Files! (In your SDD screen you must watching the Green Antenna.)
At your 1st update you must have patience, because it will take A LOT OF TIME!
Finally you are now ready to Connect your VCM, IF needs to flash it with the
proper Firmware and finally you are ready for FULL & Real Operation!
***************************************************************************
*IF you using PassThru Device (J2534), you need to install now his Driver!*
* For Actia VCI1 i advice to use versions 2.x.y witch are the best for this type of interface – see pdf files.
* After and when you will finish the Driver installation REBOOT your PC! *
***************************************************************************
Then INSIDE from your SDD you can “Switch” from VCM to your J2534 Device.
IF of course your SDD VCI Gateway Manager (the small Green icon in your Task Bar)
NOT make this “Switch” automatically when you will connect your J2534 Device…
For this, you will need to have your SDD CLOSED 1st of all and then to connect
your J2534 Device and to Power Up! Then run your SDD and go:
Settings > System Information Tab > Device Menu > and “Click” in the “blue” link
(Connect) in the the right side in your SDD screen from your J2534 Device that
you watching, and follow your simply screen instructions.
After this, REBOOT your PC and leave CONNECTED your J2534 Device!
NOTE 1: DO NOT try to use the Legacy LR-J IDS! It WON’T let you to work,
because it will asking you the RANDOM Password about EACH VIN!
ALWAYS you will using the SDD, and WHEN the Car/VIN NOT supported
from SDD, SDD it will appear 1x message about this, and you will
have 1x option to launch the Legacy IDS from there and with this
way the RANDOM Password it will By-Passed! Simply! 🙂
NOTE 2: When you will using your SDD under REAL action/usage with 1x Car
please manage to have your Internet connection ALWAYS Off-Line!!!
SDD during Diagnosis, rumors they saying sending log files
to Topix Servers and these log files they covering VIN Number’s
and such familiar “Sensitive” information!!!
NOTE 3: the best VCM2 to work with the newest JLR SDD 145:
http://www.obd2diy.fr/wholesale/nouveau-vcm2-pour-landrover-et-jaguar.html
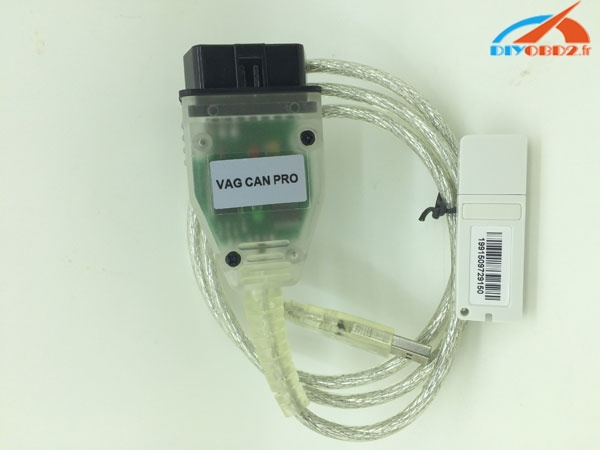
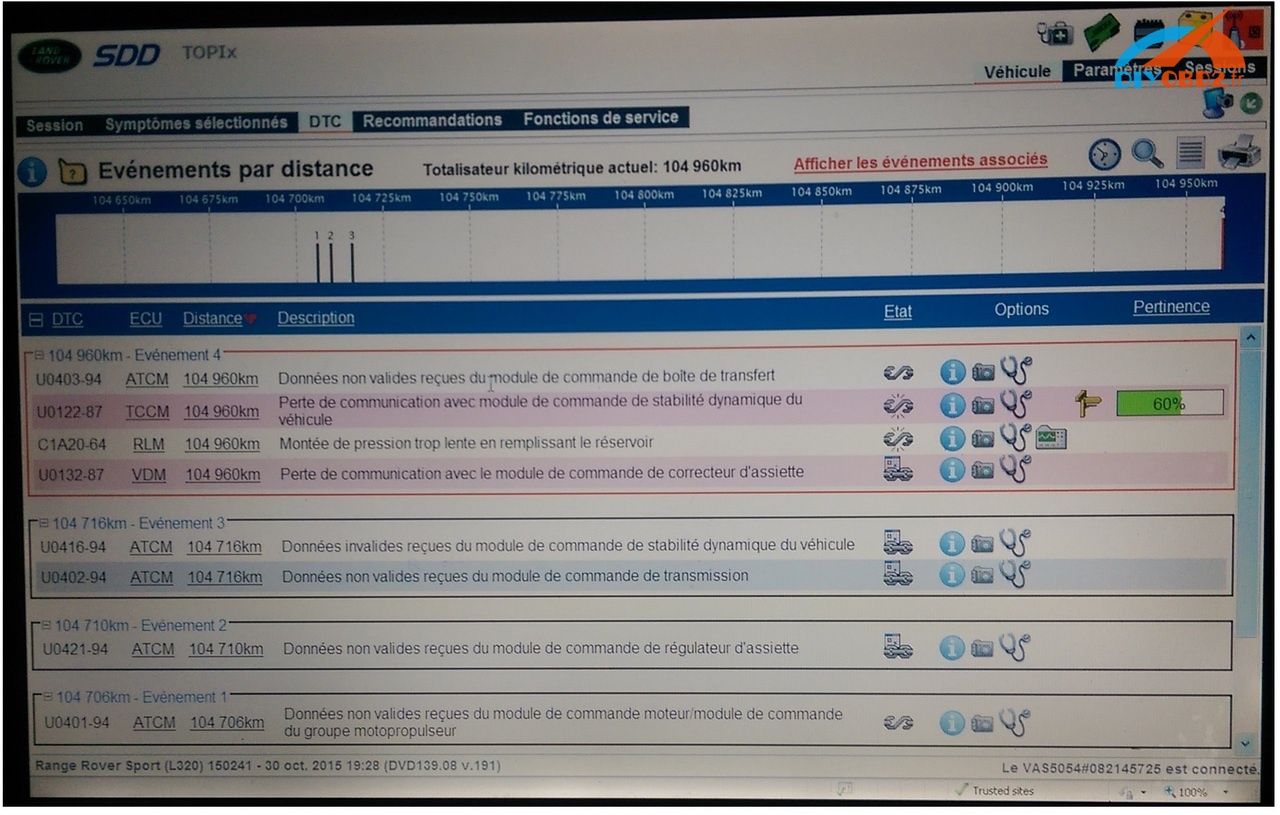
Part 3: How to use JLR SDD 139 with VAS 5054A:
Connecting VAS5054 custom program Manager to manage devices J2534.
This procedure is similar to the configuration of the VCM 2.
Install the program SDD (Symptom Driven Diagnostics) + IDS for the diagnosis of Jaguar – Land Rover.
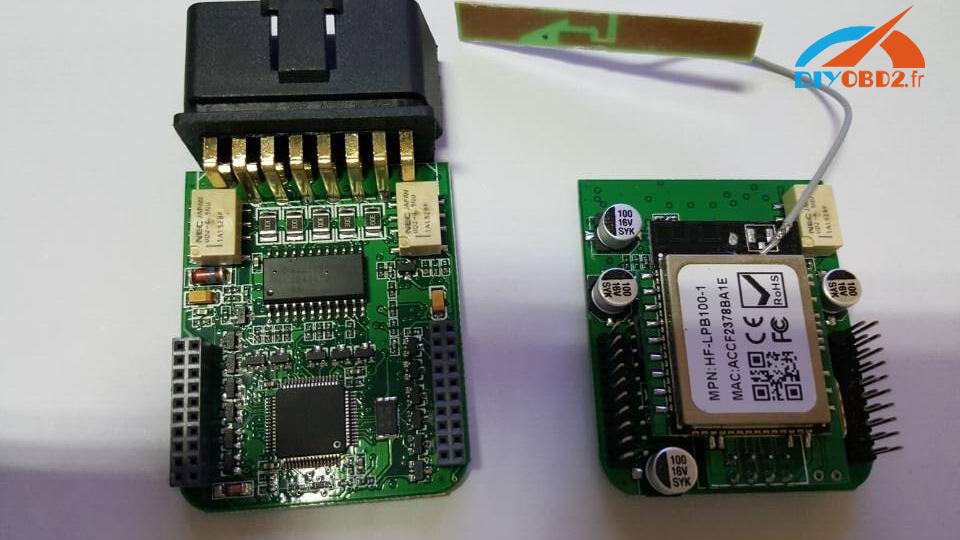
Take the adapter – which switches low speed CAN Bus with 8 and 9 foot VAS 5054 on 3 and 11 respectively and work.
By the way – VAS 5054 on will be more serious than Mongoose & China Mangoose. He couldn’t hold a candle even.
Original VAS5054 – feet can be reassigned by software.
Vas 5054a pinout 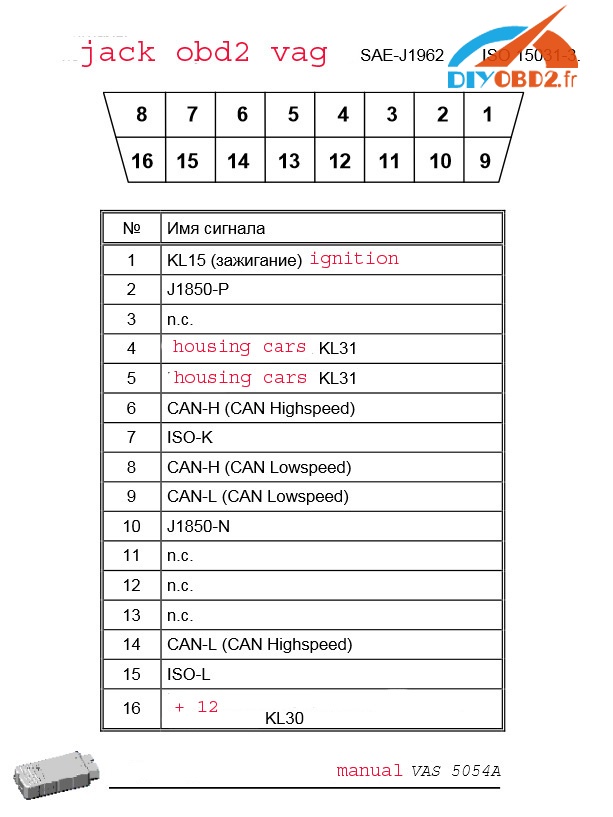
Diagram of vas5054a adapter for Land Rover

Credits to Fantomel in the MH community