DA-VINA 2534 install on win7 and pop up error message reading
“Failed to load FTD2XX.DLL. Are the FTDI drivers installed?”, what’s the solution?

Possible reason to get this error:
– The device is disconnected
– The FTDI driver is not installed.
And the windows may be incompatible or the antivirus software blocks the installation.
Solution:
– Firstly make sure your computer operation system is compatible with FTDI driver, win7 32bit is tested okay, just download from the following link which obd2diy.fr engineer upload:
http://www.obd2vip.com/html/win7-32bit-free-download-19514.html
– Uninstall all antivirus software, otherwise it may block FTDI driver installation.
– Reinstall FTDI driver.
FTDI driver installation procedure:
DA-VINA 2534 installation may cost some time, here is a simple installatio guidance:
Part 1: SDD 142.00_FULL install
Part 2: Install “VDF_JA_142”
Part 3: Install “SDD_142”
Part 4: Install Driver
Part 5: usb serial port
Part 6: Diagnose Jaguar and Land Rover models:
Part 7: Install deep freeze.
Watch video at YouTube: https://www.youtube.com/watch?v=l4YAafllPO4
Someone may find installation procedure in text is better, just follow the next parts.
Part 1: SDD 142.00_FULL install
1. Open “computer” > “DVD Drive”> “SDD 142.00_FULL”.
2. Choose the language you need, language optional: English, German, Russian, French, Dutch, Portuguese, Japanese, Spanish, Italian and Chinese
3. The software will come to the “Prepare Setup” interface.
Click “Next” and accept the agreement.
4. Tick on the square (I have read and understand this firewall compatibility) to continue.
5. Choose OK to navigate to the system information page.
6. Go to “Next” to install.
7. Then you will see a “Setup Status” interface.
8. Please choose “Yes” to agree you like Active CGM to be the default TIF viewer.
The application is installed.
9. Choose “Next” and you will see an icon of Navigation Program… on the desktop.
10. Click “Next” continuously to install to continue to complete install the MOXA UPort 1110/1130/1150 Windows Driver Setup.
Be installing CURRENT_PAG_XML_TEXT.
11. Complete installation of Shield Wizard. And one icon “JLR SDD” appeared on your desktop.
Click “Finish” and then restart your computer.
Part 2: Install “VDF_JA_142”
1. Open “computer” > “DVD Drive” to choose the first “VDF_JA_142”.
2. Choose the language you need.
3. Click “Next” to finish Shield wizard installation.
4. Restart your computer after installation.
– Install “SDD_142.01
1. Open “computer” > “DVD Drive” >”SDD_142.01″ to install shield wizard.
2. Cse OK to install SDD_142.0.
Restart your computer when you complete update.
– Install “SDD_142.02”
Open “computer” > “DVD Drive” >”SDD_142.02″ to install shield wizard.
Choose OK to install SDD_142.02.
Restart your computer when you complete update.
(the same as what you did for SDD_142.01)
Part 3: Install “SDD_142”
1. Open “computer” > “DVD Drive” >”SDD_142″
Choose OK.
Waiting for additional pinpoint test.

Finish shield wizard installation
Part 4: Install Driver
Open “computer” > “DVD Drive” >”Driver”>”setup” to install driver.
Click “Next” on the DA J2534 software interface.
Close the interface when the installation completes.
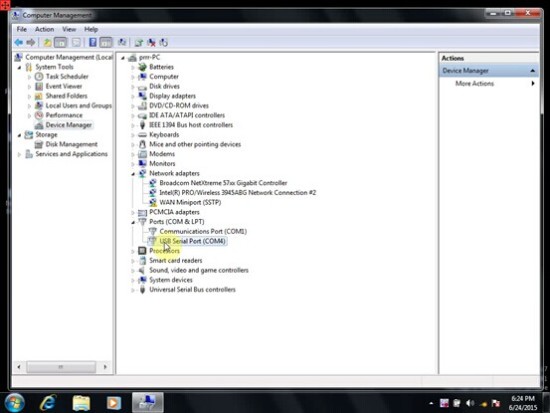
Part 5: usb serial port
Right click “computer” to choose “manager”. Then to enter the interface.
Choose “USB serial port (COM4)”.
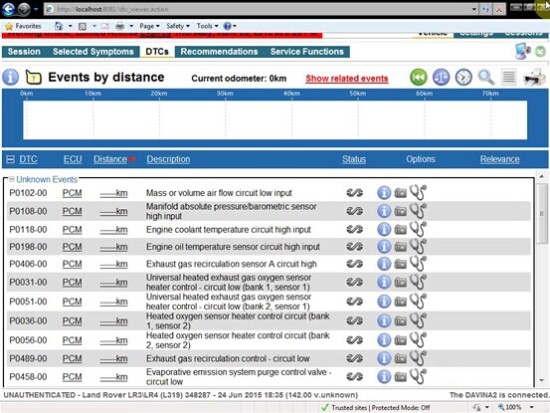
Part 6: Diagnose Jaguar and Land Rover models:
Open “JLR SDD”, it pops up “Network Connection Not Detected”, click “continue”, and then pops up “Offline Login”, click “continue”.
Finish the dealer information, click “continue”
It prompts”Update DAVINA2 VCI”, choose “Proceed with SDD”, then click “Auto VIN read”
You will get a red line reading “Workin offline: Limited Access Expires xxxx”, please note: This is test version software, please finish setup and test during the prompted date and time. And froze the computer using the froze software for CD, then test car in the near future is accessible.
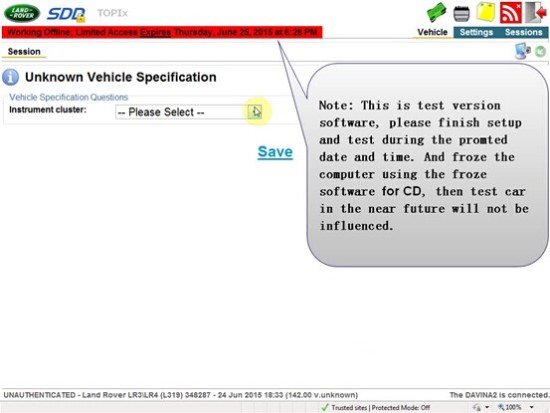
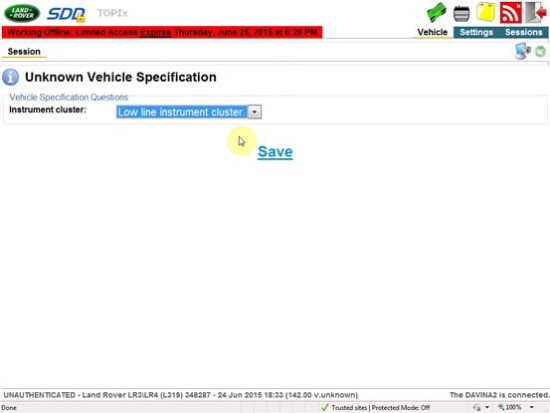
Click to save changes.
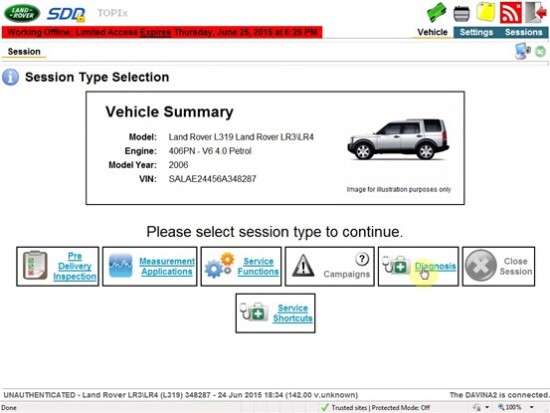
Start diagnosis.
Click to choose this session type.
Do the symptom selection.
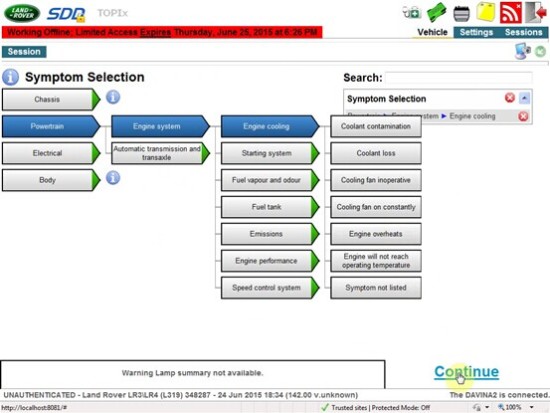
Renew data collect for this module.
Then click “Diagnosis” on the bottom.
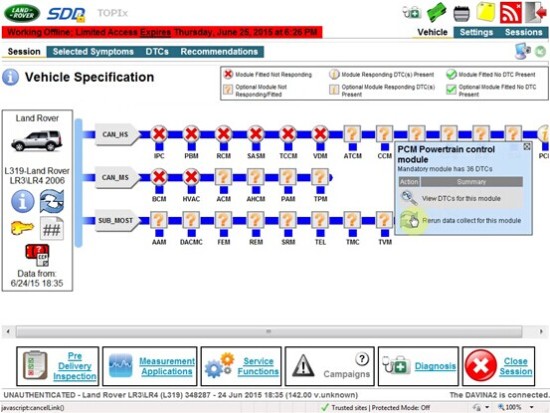
Again, do the symptom selection.
Close the interface.
Stop application.
Open “computer” > “DVD Drive” to open “DFStd_KEY”.
Minimize the file.
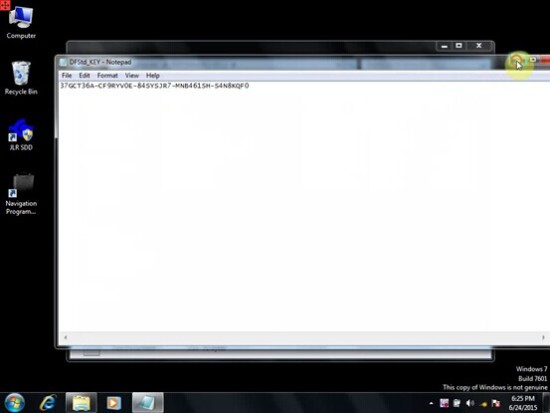
Open “computer” > “DVD Drive” to open “DFStd”.
Copy the words from “DFStd_KEY” to fill in the blank of license key, and continue.
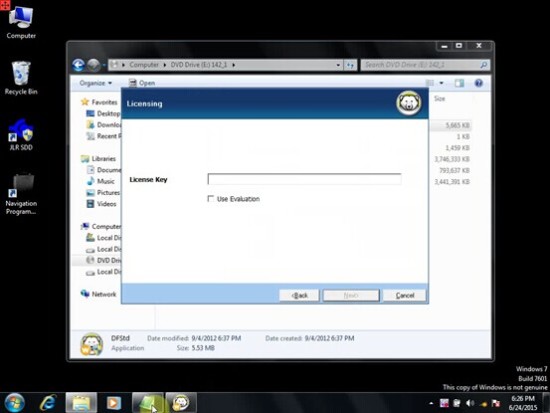
Clear the tick on line Volume D and F.
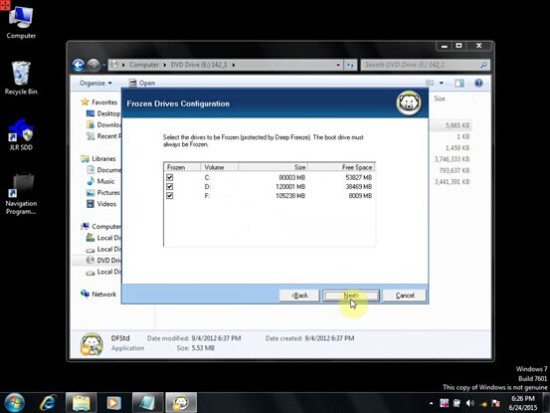
Part 7: Install deep freeze.
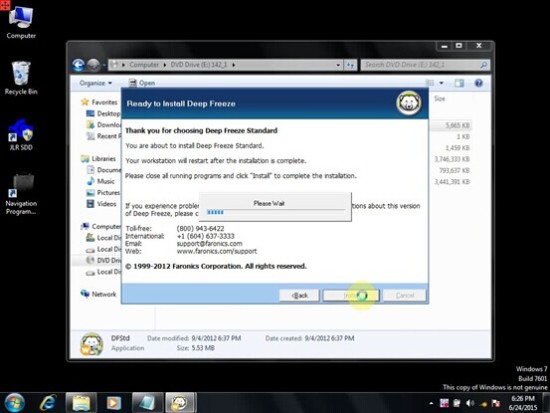
Restart your computer after installation.